Plants
Planting your avocado seed in soil at the right time is the key to avoiding rot and stalling growth — and it all starts with knowing when to act.
Picture this: you’ve patiently waited for that 🥑 seed to sprout roots, but now you’re staring at a pot of waterlogged soil and wondering if you’ve already ruined it. The good news? Timing is more forgiving than you think, especially if you follow the science behind germination triggers.
For most gardeners in Zone 6a, the ideal window is late spring — think March to April — when temperatures consistently stay above 60°F and the risk of frost has passed.
But if you’re growing indoors, you can start earlier, as long as you mimic outdoor conditions with warmth and bright light.
Below, I’ll walk you through the exact signals to watch for (like root length and seed health) and how to adjust for your climate, so you can plant with confidence — no guesswork required.
Optimal germination conditions: when your avocado seed is ready for soil
Knowing when to plant your avocado seed in soil is the difference between a thriving seedling and a failed experiment. Your seed must show clear signs of readiness before transplanting—rushing this step often leads to root rot or stunted growth.
The key is watching for three critical indicators: root development, seed health, and environmental cues that signal it's time to move from water to soil.
First, your avocado seed should develop a 2-3 inch root system before planting. This means the roots should be thick and white, not thin or mushy. If your seedling has roots longer than 3 inches, it’s definitely ready.
Smaller roots (1 inch) need more time in water to strengthen. Healthy roots are your first green light for soil planting.
Next, examine the seed itself. A ready seed will have a firm, slightly wrinkled exterior with a small sprout emerging from the top.
If the seed feels soft or smells foul, it’s rotting and should be discarded. Fresh seeds with a slight brownish tint on the edges are ideal candidates for transplanting.
Environmental factors also play a role. Temperature is crucial—avocado seeds thrive in 70-85°F conditions. If your home stays cooler than 60°F, germination slows dramatically. Humidity matters too; low humidity can dry out delicate roots. Aim for 50-70% humidity during the germination phase.
Seasonal timing affects success rates. In USDA Zones 9-11, plant your seedling outdoors in spring (March-April) after the last frost. For cooler zones (6a-8b), wait until late spring or early summer to avoid frost damage.
Indoor growers can plant year-round but must provide supplemental grow lights if natural light is insufficient.
| Indicator | Ready Condition | Action Required |
|---|---|---|
| Root Length | 2-3 inches (thick, white) | Prepare well-draining soil mix |
| Seed Health | Firm, slight wrinkles, no rot | Disinfect soil with hydrogen peroxide |
| Temperature | 70-85°F (21-29°C) | Use heat mat if needed |
| Humidity | 50-70% | Mist daily or use humidity tray |
| Season | Spring (after last frost) | Hardening off for 1 week |
Light exposure is another critical factor. Your seedling needs bright, indirect light for at least 6-8 hours daily. Place it near a south-facing window or under grow lights if natural light is insufficient.
Yellowing leaves signal light deficiency, while brown tips indicate too much direct sun. Adjust placement gradually to avoid shock.
Before planting, harden off your seedling for 5-7 days. This means exposing it to outdoor conditions for 1-2 hours daily, increasing duration each day. Hardening off prevents transplant shock when you move it permanently to soil. Start with a shady spot and gradually introduce it to full sun.
Finally, choose the right soil mix. Avocado seedlings need well-draining, slightly acidic soil (pH 6.0-7.0). A blend of 50% potting soil, 30% perlite, and 20% compost works well.
Avoid garden soil, which can compact and suffocate roots. Sterilize your mix with hydrogen peroxide (3%) to prevent fungal infections.
Once you’ve confirmed all conditions—root length, seed health, temperature, humidity, and light exposure—your avocado seed is ready for soil.
Plant it at the same depth it was growing in water, and keep the soil moist but not soggy for the first 2 weeks to reduce stress.
With these science-backed indicators and careful preparation, your avocado seedling will transition smoothly from water to soil and start its journey toward becoming a healthy tree. Patience and attention to detail during this phase set the foundation for years of growth ahead. 🌱🥑
Step-by-step soil planting process for avocado seeds
Now that your avocado seed has sprouted roots in water, it’s time to transplant it into soil for stronger growth. The transition must happen at the right size—wait until your seedling reaches 4-6 inches tall with a 2-inch root system.
This ensures it’s sturdy enough to handle soil without toppling over. Choose a warm season like late spring or early summer for outdoor planting, or anytime indoors with proper lighting.
Your seedling thrives in a well-draining mix of potting soil, perlite, and compost (ratio: 2:1:1). Avoid garden soil—it compacts and suffocates roots. A 6-inch diameter pot with drainage holes is ideal for starters, but upgrade to 12-inch pots as it grows.
If planting outdoors, select a sheltered spot with partial shade to protect the delicate seedling from harsh sun.
Step-by-Step Planting Guide
-
Step 1: Prepare the Container
Fill your pot with 60% potting soil, 20% perlite, and 20% compost. Leave 1 inch of space at the top for watering. -
Step 2: Handle the Seedling Gently
Remove the seedling from water, shaking off excess moisture. Hold the seed base (not the stem) to avoid damage. Trim roots to 2 inches if overly long. -
Step 3: Plant at the Right Depth
Bury the seedling up to its first leaves—no deeper. Press soil lightly around the base to secure it without compacting. -
Step 4: Water Thoroughly
Use room-temperature water and saturate the soil until it drains from the bottom. Avoid soggy soil—drainage holes are non-negotiable. -
Step 5: Place in Bright, Indirect Light
Keep indoors near a south-facing window for 2-3 weeks to acclimate. Gradually introduce direct sun to prevent leaf scorch.
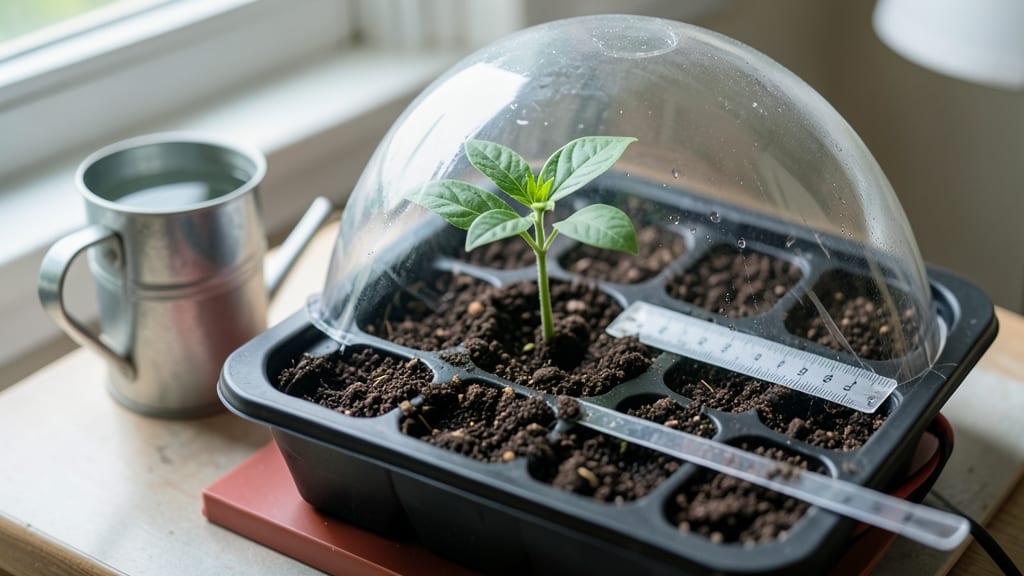
After planting, maintain 70-80% humidity by misting leaves daily or using a humidity dome. Avocado seedlings despise dry air—group pots together to create a microclimate. Monitor soil moisture by sticking your finger 1 inch deep: water when dry. Overwatering is the #1 killer—yellow leaves signal root rot.
Fertilize lightly 6 weeks after transplanting with a balanced 10-10-10 fertilizer diluted to half-strength. Feed every 4-6 weeks during spring/summer, but skip fall/winter when growth slows. Prune leggy stems to encourage bushier growth, always cutting just above a leaf node with sterilized scissors.
Your avocado seedling will need 6+ hours of sunlight daily once acclimated. If indoors, supplement with a grow light 12 inches away for 14 hours/day. Rotate the pot weekly so it grows straight, not lopsided.
Patience is key—fruit production takes 5-13 years, but the journey starts now with proper care.